Create a debug configuration
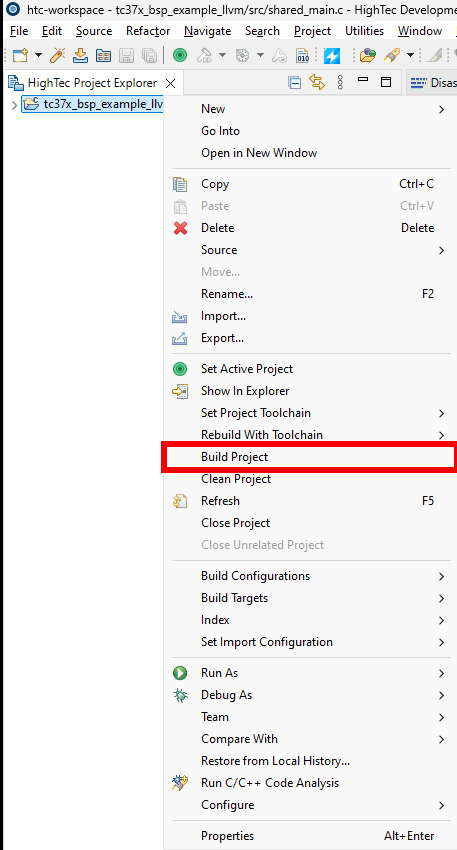
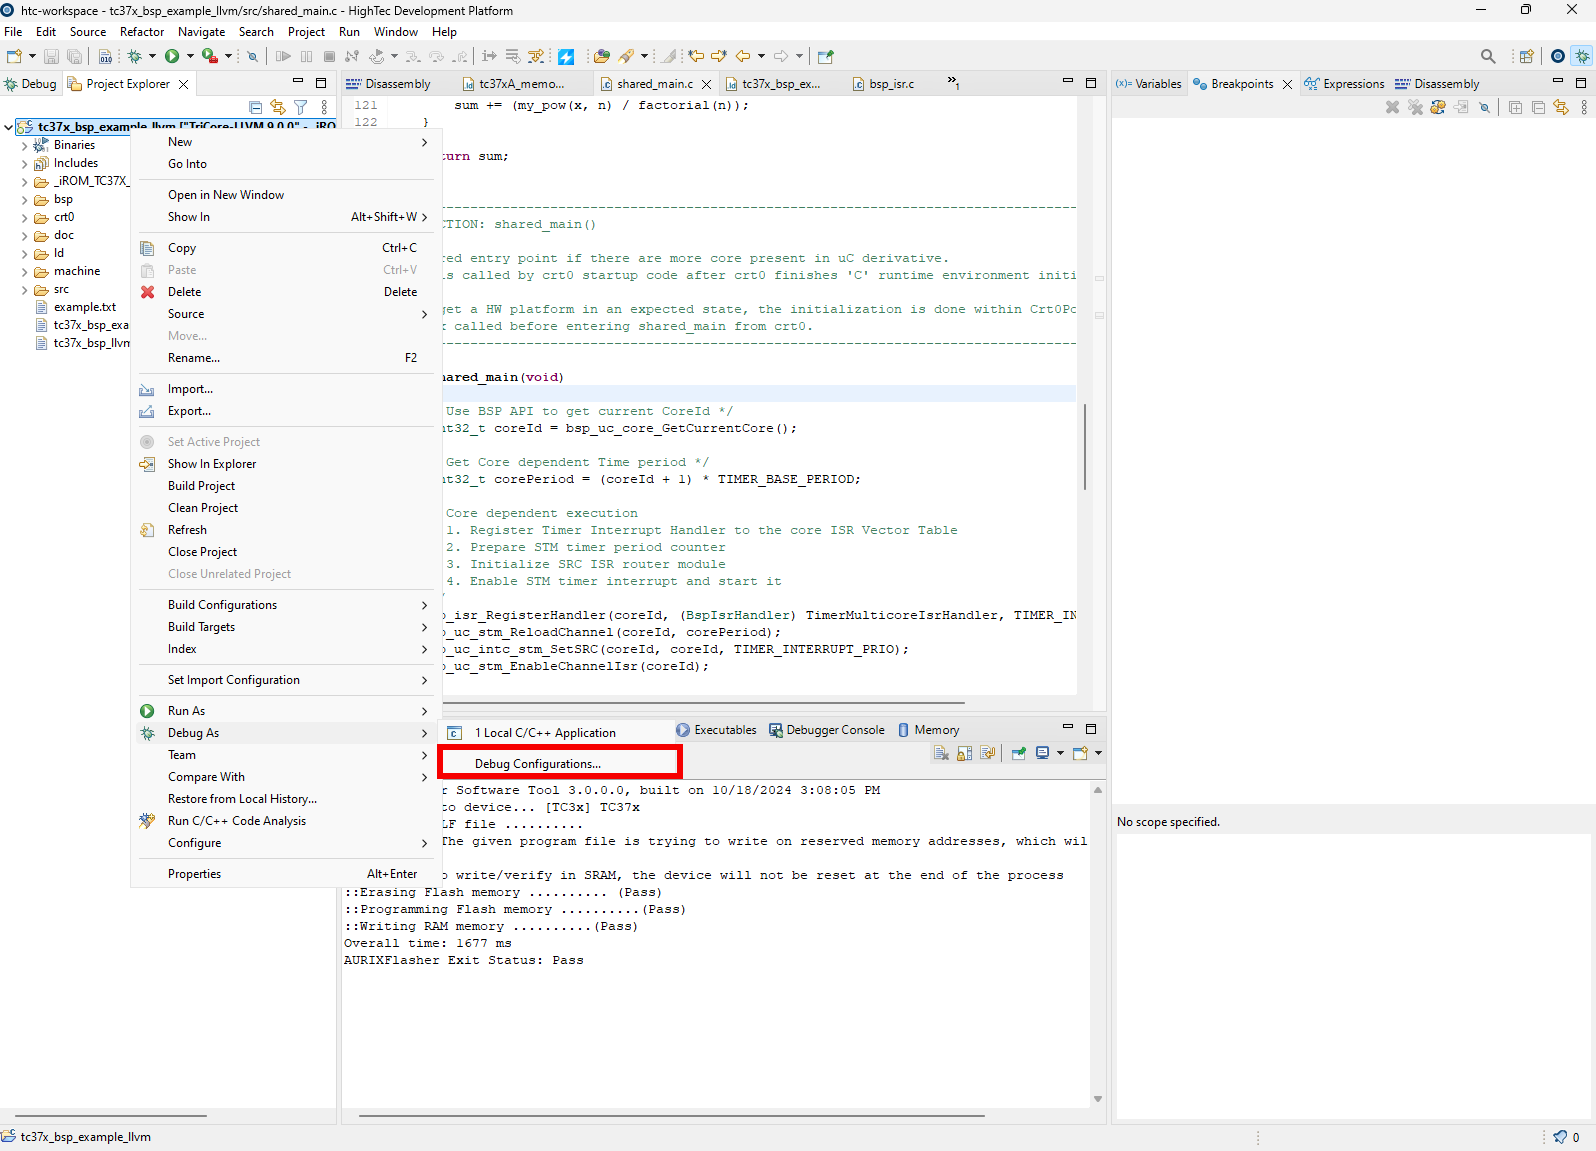
Before creating a debug configuration, first build the project. After the example project was built, right click on it → Debug As → Debug Configurations…
Build the project
Open the Debug Configurations menu
Create a new debug configuration
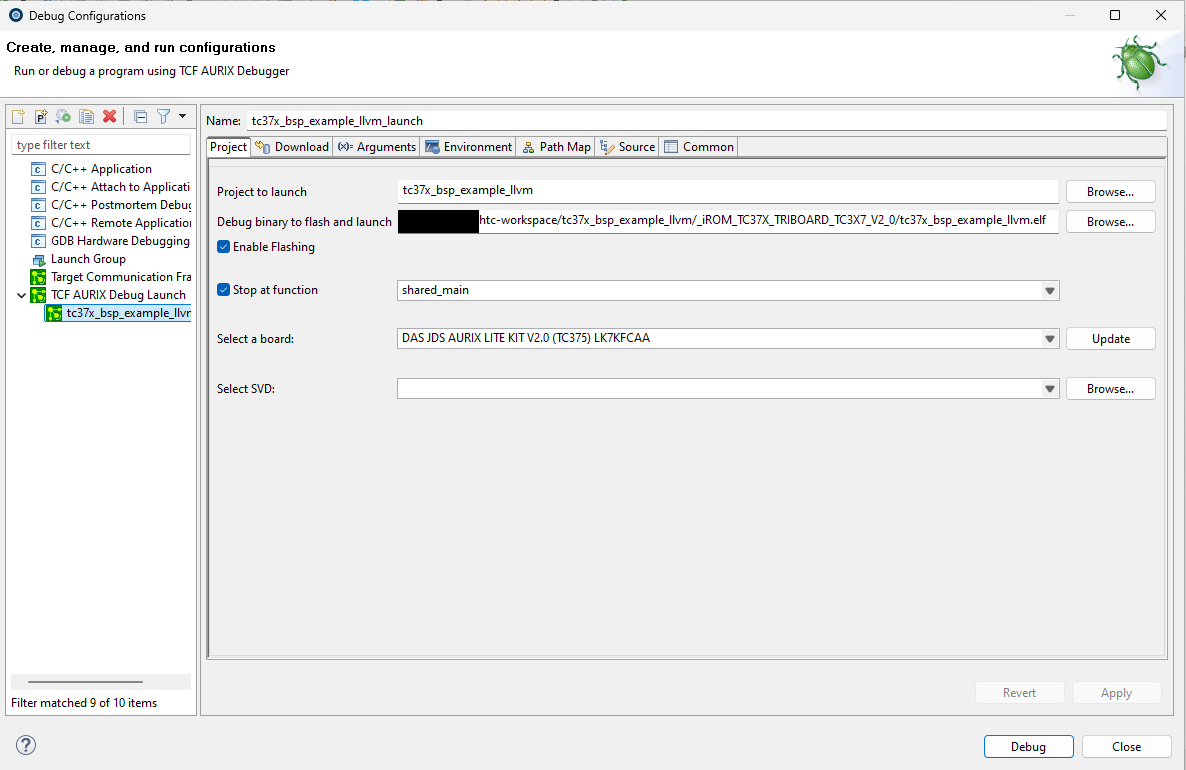
The meaning behind the different fields:
Project to Launch
The project which is to be debugged. The default value is the currently active project
Debug binary to flash and launch
The binary file which will be used by the flasher to flash onto the board, also used by the debugger to get symbol information, debug information, assembly instructions etc. The default value is the auto detected elf for the active project.
Enable Flashing
If ENABLED, the selected binary will be flashed onto the board. The default value is ENABLED.
Stop at function
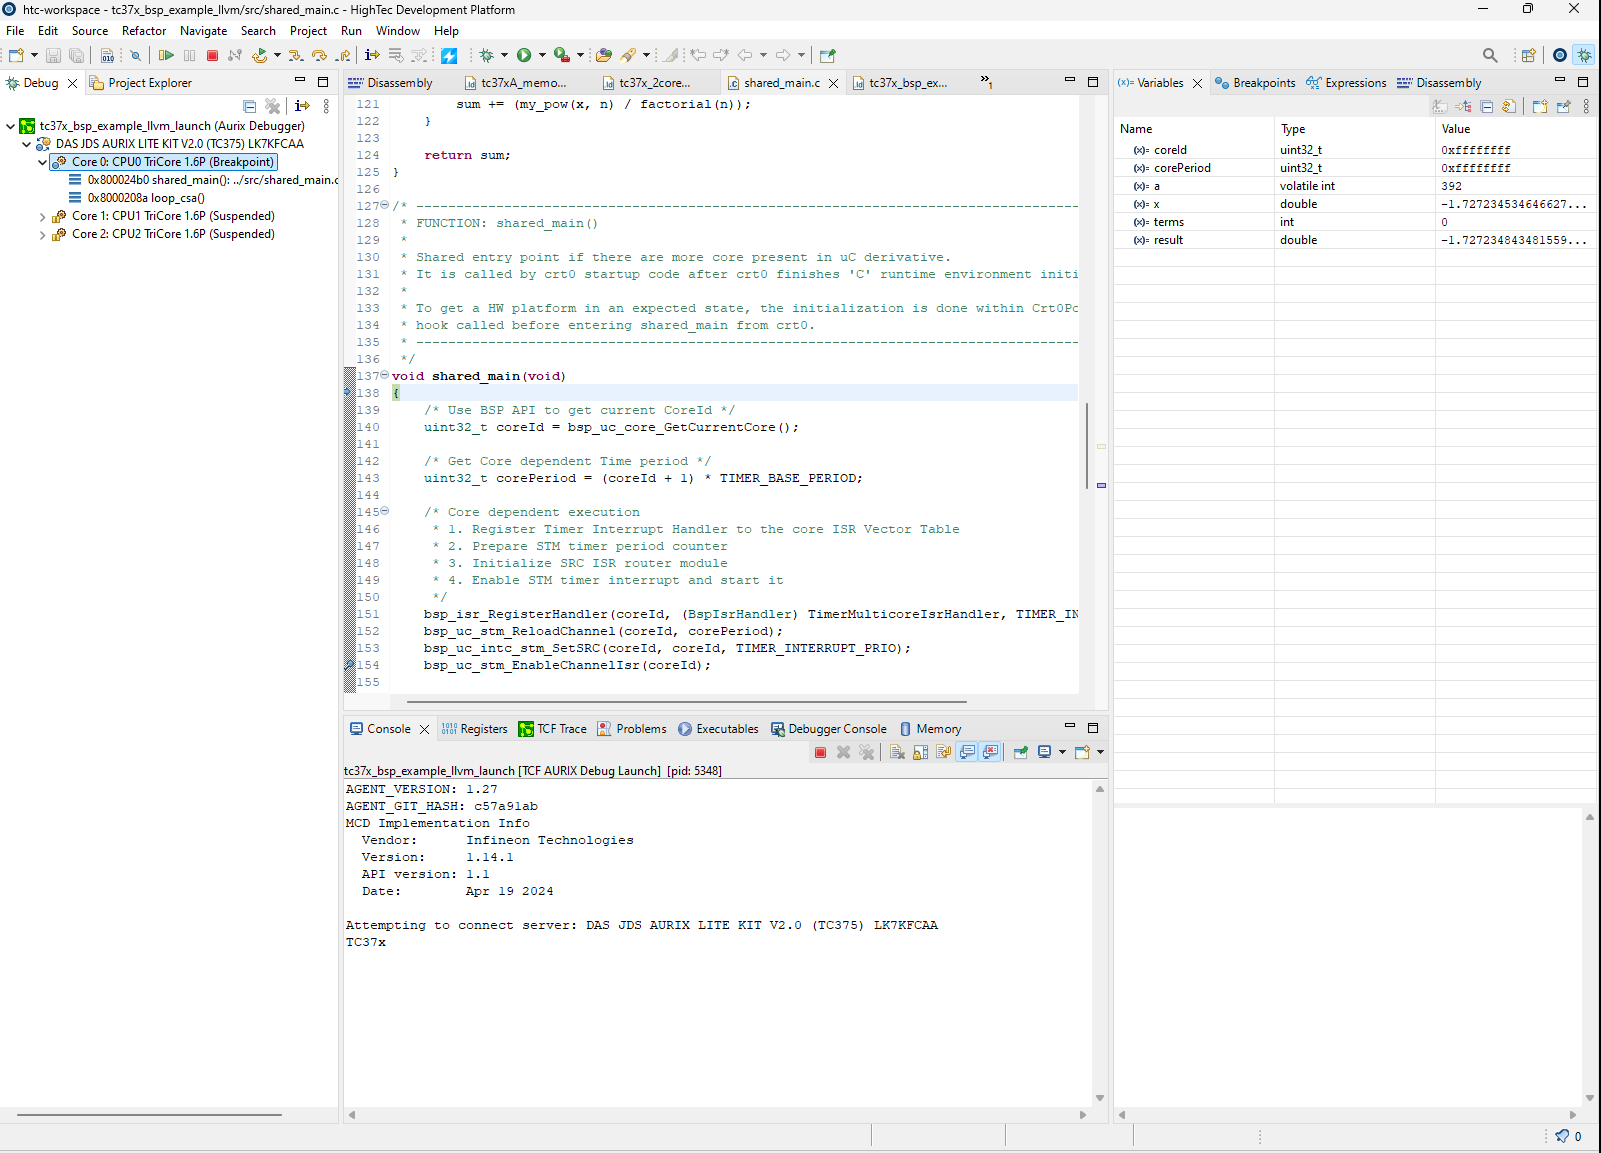
The function where the debugger will stop after launch, and after every reset. The default value is the shared_main function.
Select a board
The board which will be used for the debugging. The default value is the currently connected board.
Select SVD
Description file for the board which contains the information about special function registers and peripheral registers.
When creating a new debug configuration, these fields have default values, so the debugger can be launched immediately without any modifications by pressing the Debug button.